
When properly installed, asphalt shingle roofs require very little maintenance. This is one of the main advantages of shingle roofing. There may be occasions when a little maintenance is required. Fortunately, asphalt shingles are easy to remove and replace in just seven steps. Although the process is simple, it is important that only licensed roofing contractors are allowed to do a roof repair or replacement.
Step 1 – Remove the target shingle seal
The first step is to remove the nails that hold the shingle to the roof deck. To reach the nails, the roof deck will need to be lifted. However, the asphalt sealant spots on the shingles may have bonded the shingle to the shingle below. This sealant bond is very strong and can be broken by placing a flat prybar under the target shingle’s edges. This sealant separation works best in cool weather as the sealant bond is easier to shear by the prybar when cool. In hotter weather, sealant will be more stubborn and gooey, making it more difficult to separate.
Step 2 – Break the adjacent seals
Once the sealant bond has been broken on the target shingle, the same bond must be broken on any overlying shingle/shingles. They can then be gently lifted to expose the nails in the target shingle. It is important to make sure that the seals surrounding the affected shingle be replaced correctly. Else, this could lead to more problems than you started. It is highly recommended that roofing tasks be done by professional roofers. DIY is good but professional roofing services is always better.
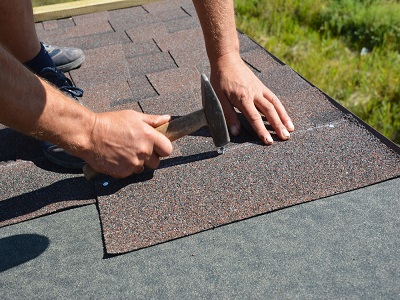
Step 3 – Take off the nails
Sometimes, the nails can be removed directly. However, prying out nails from the top of the shingle can cause damage to the shingle’s granular surfaces. It is better to lift both the nail and the shingle simultaneously. You will need to reach the bottom of the target shingle.
Step 4 – Remove any adjacent nails
After all four nails have been removed from the target, you will notice that it is still not possible to remove them. Because the nails in the shingles below it will also penetrate the target shingle’s upper edge. This is an important factor in the roof’s wind resistance.
Step 5 – Get rid of the old shingle
Once all sealant bonds have been broken, and all nails removed, the target shingle can be removed.
Step 6 – Install the new shingle
Slide the replacement shingle into place. You can then nail it in place and re-nail any shingles that have been removed previously. Roof repair in Myrtle Beach is simple in given circumstances. However, general roof repair is best left to the professionals.
Step 7 – Seal the shingles
Remember to break all shingle-to-shingle sealant bonds. The new roof shingle will likely seal adjacent shingles in the time it has enough sun warmth. However, it is best to manually seal the shingle in its place. Apply three small amounts of asphalt plastic roofing cement to the tabs of the new shingle. Spread evenly along the length of the shingle and then press the shingle down into place. Seal any shingles around that have lost their sealant bonds in the same manner. This will ensure that the roof’s wind resistance is maintained as it was before.
Replacing broken shingles can be dangerous. It’s a task reserved for professionals. Call Greg Lilly Roofing & Restoration today for reliable roofing services in Myrtle Beach.
Like our Facebook page for more great info about roofing services.
Greg Lilly Roofing & Restoration
4201 Carolina Exchange Drive Suite 202
Myrtle Beach, SC 29579
843-222-9796
https://www.greglillyroofingandrestoration.com


No comments:
Post a Comment